ZX-9R Valve Check and Adjustment
Tear your bike down until you've got the valve cover off your bike.
Now get out a pen and paper and draw sixteen circles organized like your engine (top row is exhaust, bottom row is the intake valves—see photo below).
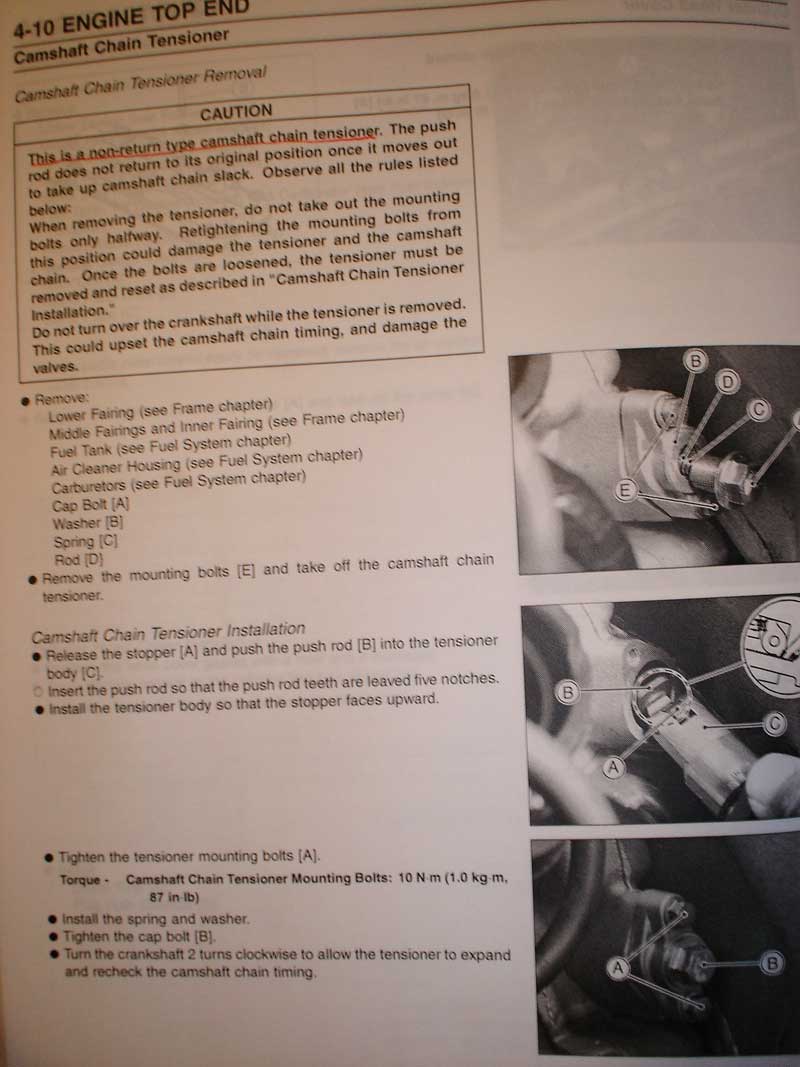
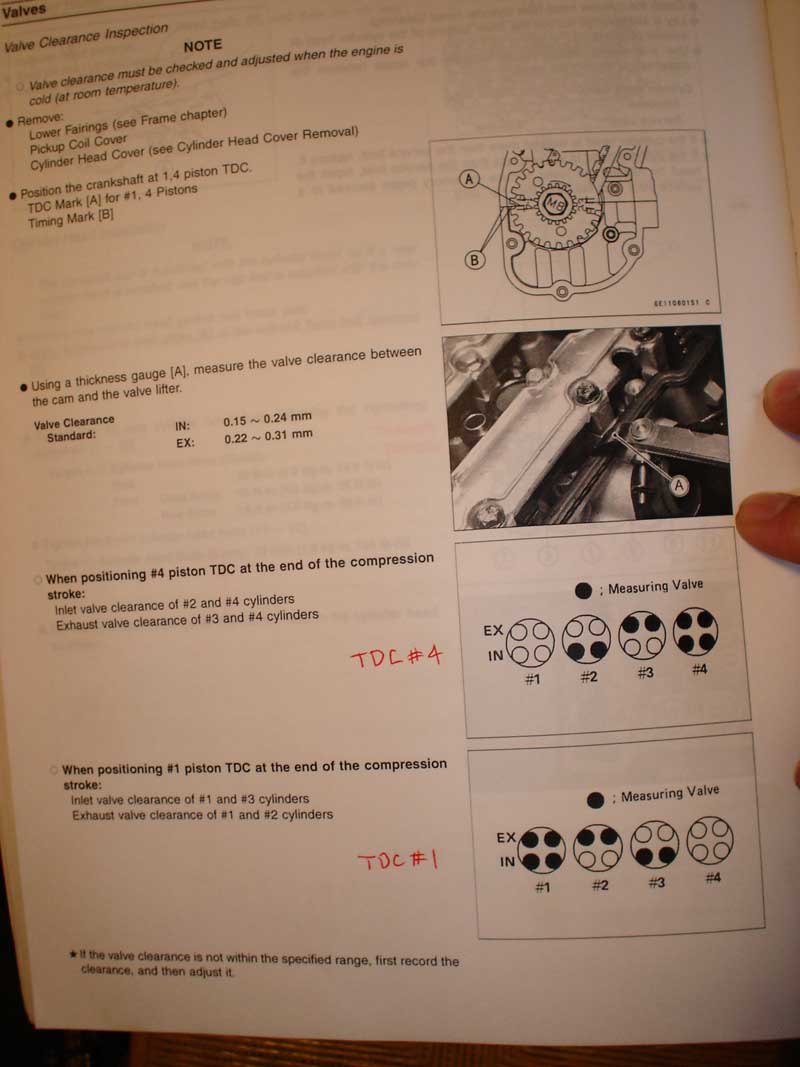
Pop your timing cover off and put the bike on TDC #4 and check half your valves with a feeler gauge (see page 4-11 below). Don't be too concerned if you cannot get the marks to line up exactly. Just get them as close as you can.
Now take a look at the page below and note what valves you measure while the engine is on TDC #4. When checking your clearances with your feeler gauge don't be afraid to take your feeler gauge apart and double up the blades if necessary to get an accurate measurement. Take note: The blades should fit in without forcing the blade in between the bucket and the cam. I'm stressing this point because you can shove in too big a of blade—slightly opening the valve in the process—and get an inaccurate measurement. The blades will just slide in and by the time you've checked a couple of valves you will have developed a "feel" for using your feeler gauge correctly.
Record the measurements you get on the sheet of paper you drew the circles on to represent each valve. Then rotate the engine to TDC #1 and check the rest of the valves.
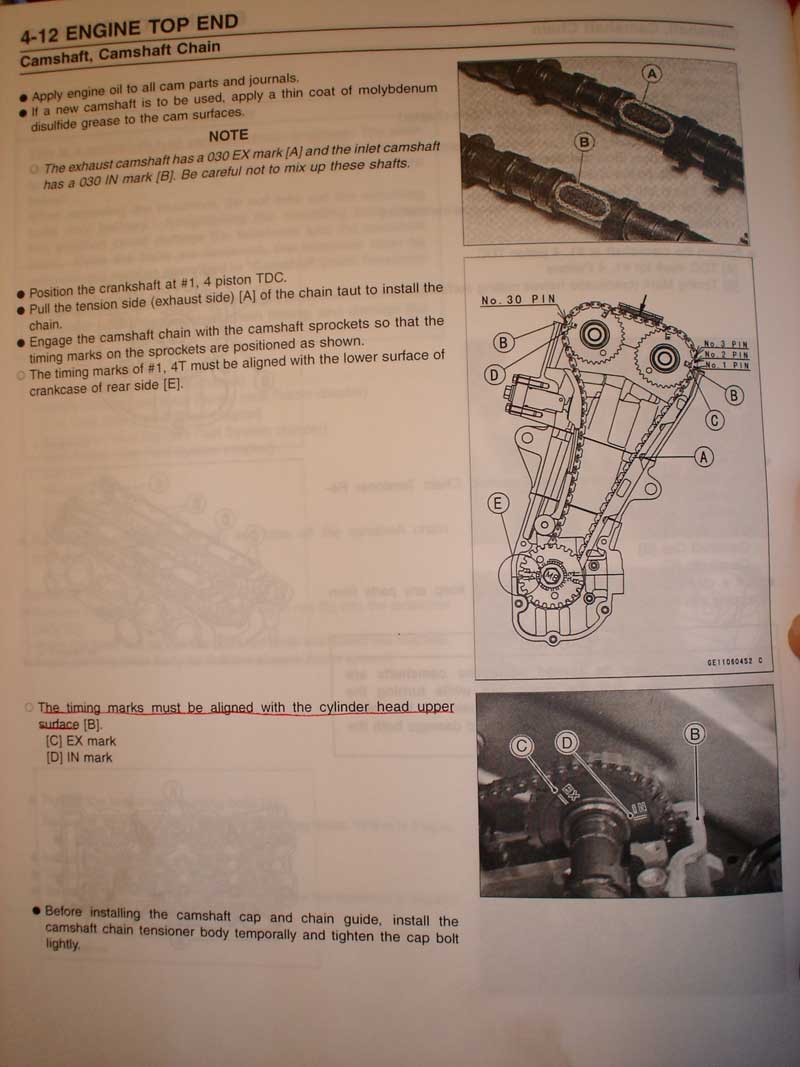
Now I cheat a little and use red nail polish to put three clear reference lines on the timing chain with a line on each cam and the last line on my timing gear so I don't have to think too much about timing everything on assembly. I do this because timing chains stretch and it seriously stinks if you cannot get the factory timing marks to line up.
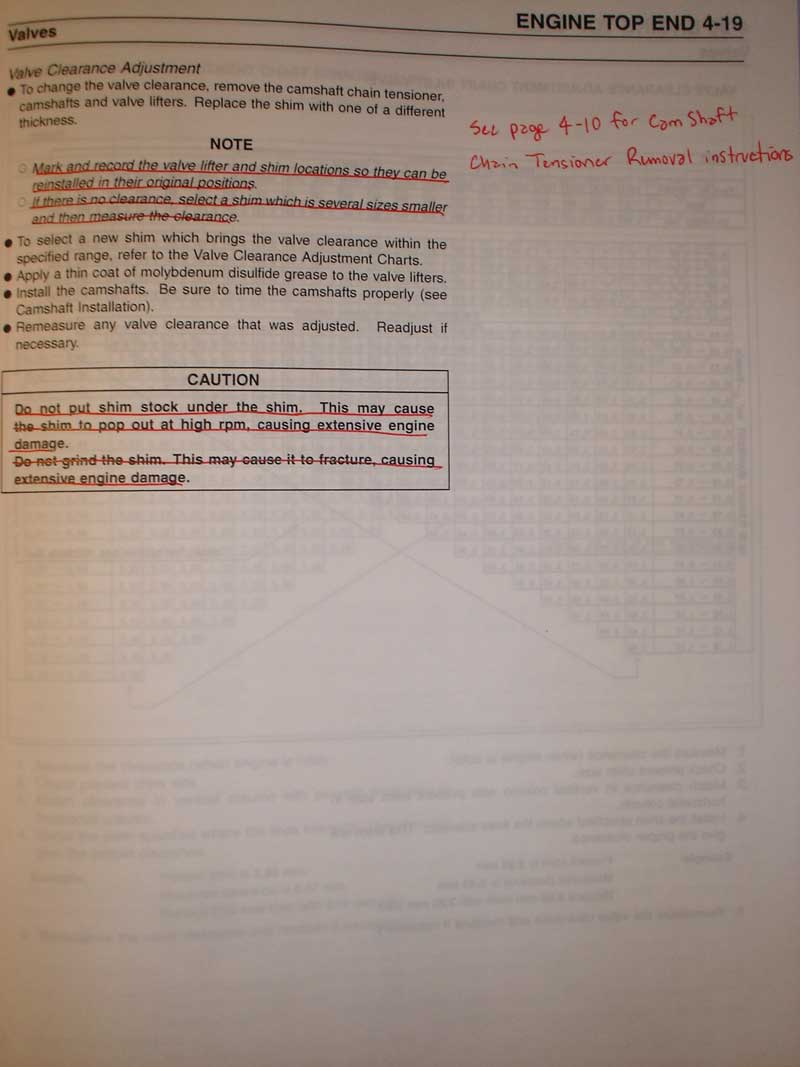
Once you've made your own reference marks, pull out the timing chain tensioner to slacken up the timing chain so you can pull out the cams (only one at a time) when you need to (see below page 4-10).
Get an empty egg carton and label 16 holes to correspond to each valve in your engine. You are going to place your cam bucket and the shim from each valve into the carton so you don't get them all mixed up (see notes on page 4-19 below).
Then pop your cams out one at a time so you don't drop your timing chain and use a magnet on a stick to lift the buckets up off of the valves that need adjustment. The shim under the bucket should "tag along" ('cause you used a magnet) as you use the magnet to lift the bucket up off of the valve. Remember to place the shim and the bucket into the correct spot in your egg carton!
Get out a caliper (I used a cheap, digital caliper from Harbor Freight) and measure each shim. Do this for every shim that needs to be changed out making certain you record that number next to the circle that represent the valve it came from on your paper while making sure that you don't get the shims mixed up.
Now using math skills, see if you can't swap around shims to get your valve clearances in spec. For example lets say you measured 0.09mm clearance with your feeler gauge with a spec of 0.15-0.22mm and your shim is 3.05mm. In this case see if you don't have a 2.95mm shim from a different out of adjustment valve that you can use to get the valve clearance correct on the valve your messing with.
Eventually you'll need to run down to the dealer and swap out the shims you have to get the shims you need.
Good dealers don't charge anything for this. My dealer charges $3.50 per shim.
Special Note: The hardest part of the whole job is wrestling the stupid, plastic air dam that holds the stick coil wiring harness on and off the bike. I somehow got the plastic thing off without having to remove anything from the valve cover but to get the blasted thing back on, I had to take off the two plates that support the clean air deal to get clearance. When you're trying to get it back on and it is stuck, make sure you're not jamming it into your radiator.
In addition, pay attention to how you finagle the valve cover off. There is only one way to sneak it back on.
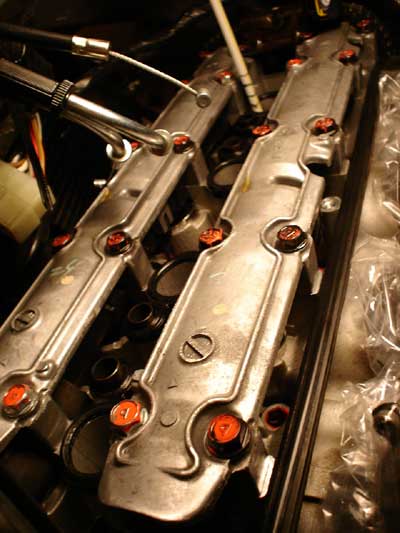
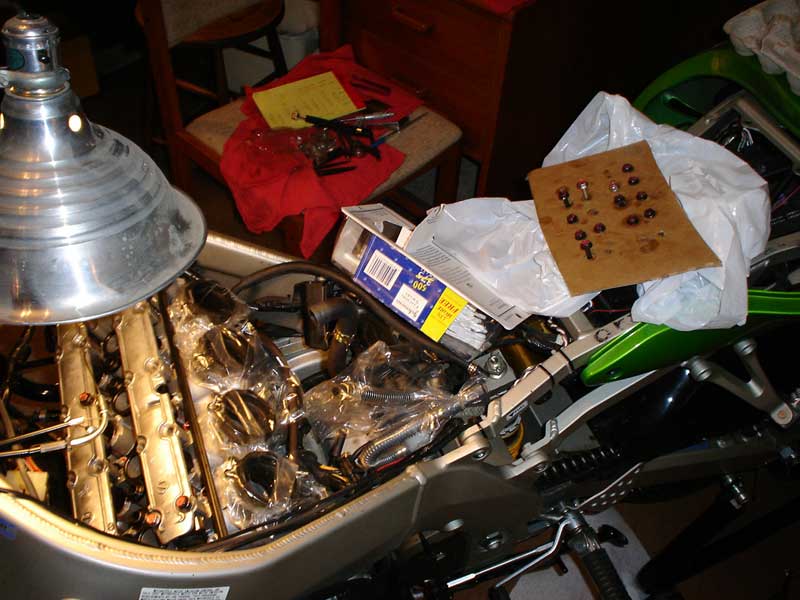
This photo shows what you can expect to see once the valve cover is off your ZX-9R. I've also removed all four spark plugs and used a straw stuck down into the cylinder to help locate TDC on #4 in this photo.
![]()
This is what my paper looked like that I used to record my valve clearances as well as the size of the shim stock I had. In addition, I recorded the size of the shim stock I'd need to use to bring my valve clearances into spec on my '01 ZX-9R.

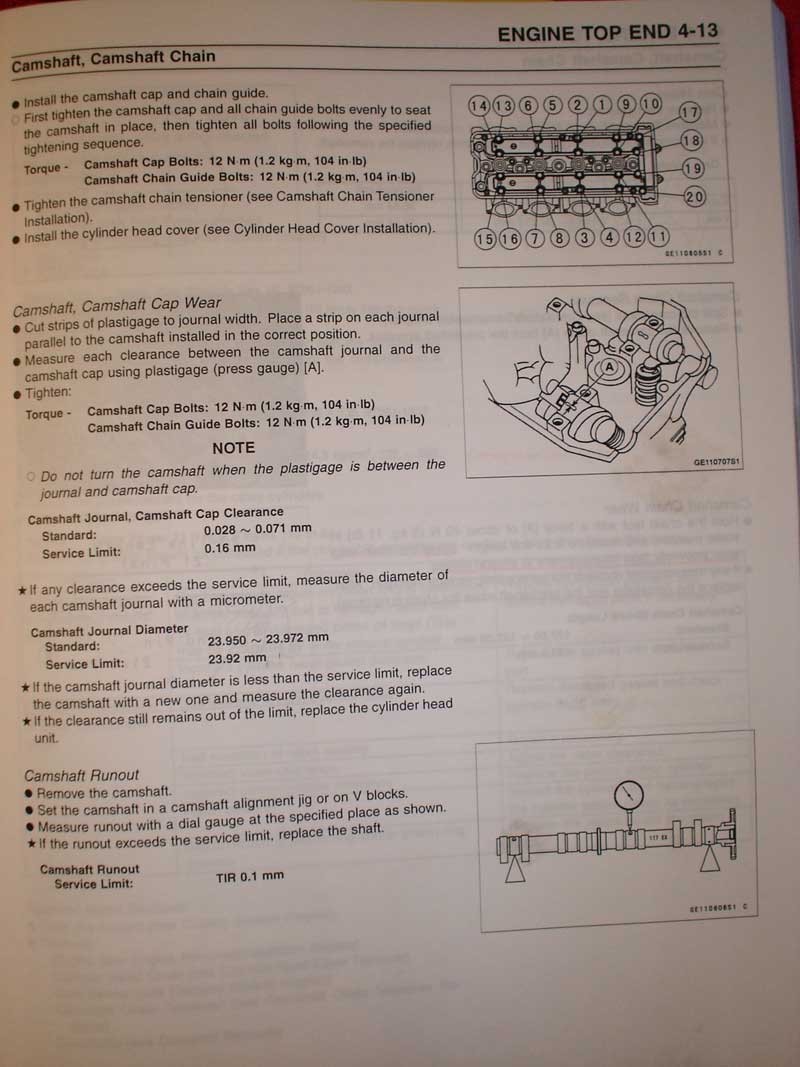
Here you can see that I used a bit of cardboard with holes in it to keep track of what bolts go in what holes on the two cam caps.
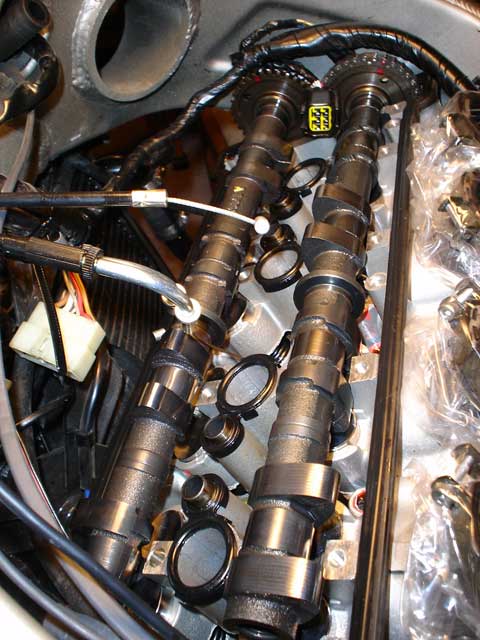
If you have to lift your cams to adjust your valves, lift only one cam at a time. This will keep the timing chain from dropping. In this photo I've already adjusted the exhaust valves and placed the exhaust cam back into place. Note the red paint I've used to locate the cams with the timing chain. There is also a paint marker down on the timing chain and timing chain guide behind the timing cover.
Eric's Motorcycling Do-It-Yourself Page
Return to the Motorhead Christian page